
This month we discuss:
Here is a collage of some pictures from this month's example.

The images shown in this example are in the "computer" as a result of being obtained from a digital camera or from scanning a photograph or other item. The following shown images default to digital camera origin and, if not, the shown picture will be identified as a scanned image. If digital camera, the photograph has normally been taken at an Olympus Camera "HQ" setting of 1.3 megapixels (1280 x 960), with some pictures having been taken at less pixel detail ("SQ") 0.3 megapixels 640 x 480). In most cases, even if the digital picture was taken at these-mentioned sizes, the picture has been resized for showing on computer screens. I try to keep most images to have a maximum height of 600 pixels for computer-display. I use Paint Shop Pro (from JASC) as my primary application for modifying/resizing/coming photographic images into one image (photo).
Scanned photographs are scanned at 300 PPI (Pixels Per Inch), 150 or 100 PPI, and the chosen PPI will be identified in the comments for that particular image.
The following is aimed at showing examples of using a computer system, digital cameras, and perhaps scanners, as part of home computing environment. Hopefully, the shown pictures will give you some ideas for use of your home computer system.
Contact SCScompA if you have any comments/questions regarding anything that is shown in this Web page.
Sometimes it is interesting/effective to "join" multiple images into a single image.
I use PaintShop Pro to do this. Some people using "Photo Shop" or some other image-processing application. Whatever you have access to that works: Use it! I use PaintShop Pro for a number of reasons -- two basic reasons being: Its price is reasonable (about $100 USA one time cost per major version; a major version comes available every two-years or so and normally the upgrade price is around $50) -- and the product works to my satisfaction for my purposes.
In addition to the above very-basic reasons: I sometimes use a "free" part of PaintShop Pro: Its Animation support. I put free within quotation marks since I realize nothing is free.... I am sure some part of Animation development/maintenance costs is included in the $100 original price for PaintShop Pro. However, up until now (May, 2003) there is no additional cost for the animation part of PaintShop Pro.
Building an animation is very easy with PaintShop Pro and this newsletter item is not going to show you how to built the animation. This example is intended to only trigger some thoughts on your side of things; if you have multiple/related images, consider an animation to present the information.
We had a situation this Spring that involved a new Magnolia blossom. It was amazing (to me) to see the blossom open in the morning as the sun rose and, in turn, close later in the afternoon.
The following is a non-animation image that has included in it most of the images I use in the animation.
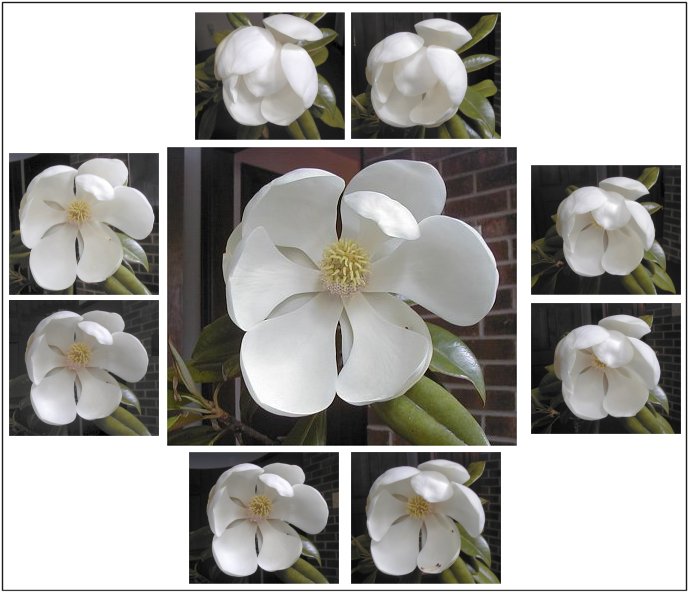
The above-shown image had a download size of 70KB (0.070 Mb). The individual images that were combined to show the above were each resized to be small enough to be included together for viewing.
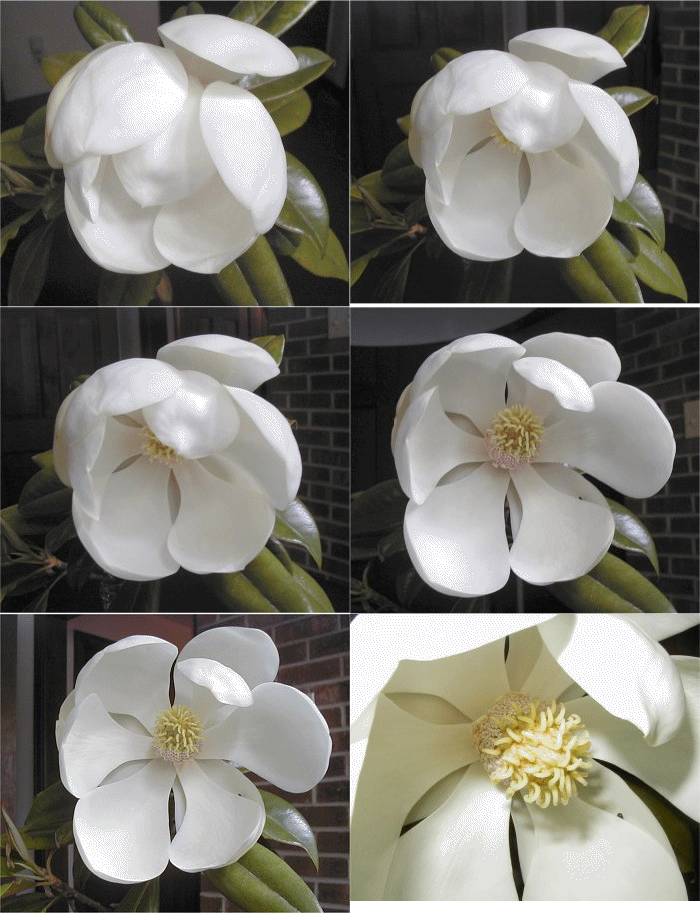
The following animation has a download size of 522KB (0.522 Mb). Each of the individual images in the animation are larger than those merged into the previously-shown non-animation image, since the images are shown one at a time and there was less concern about screen-display area since only one image of the animation was included at a time when the animation was built. We could have chosen to (for example) combine two images at a time -- however, we kept each individual image separate.
The animation was built as a continuous loop. We could have chosen to have the animation "run" a set number of times before ending.
Following, is the example. The download time for the entire animation is around two minutes on a dial 56Kb connection.
There are nine images in the animation. The first seven images, showing the opening of the blossom, are shown with a one-second delay between each and there is a 3-second delay after the seventh. The elapsed time for the individual images was about five hours. The eighth and ninth images are a closer-look at the center of the flower. There is a final 3-second delay after these final two images.
One final comment about the size of the animation: Remember, if you use HTML or something to show your presentation/information locally on a computer, download time is not an issue. Plus, as we all know: Many Web users have high-speed (as compared with 56Kb dial) connection and, likewise, download time for animations is much less concern than when using dial Internet connection.
If you have need of an animation and have access to PaintShop Pro, give its Animation feature a try.
When I started this example -- awhile ago -- I thought it would be easy. It turns out that making a single postcard per printed page was quite straight forward. After that straight-forward example, I tried to print four postcards per printed-page -- and that was more difficult to do than I expected. What was the difficulty? Lining up the back side of the postcard onto the front side!
In any case -- the idea (a user-created postcard) intrigues me and the example below is to (hopefully) initiate some thoughts on your part as you continue your home computing.
The self-made postcard concept was brought to me through an example that was mailed to us as an insert in a magazine. The example brought to mind: "I could do that!" and the following exercise was the result.
The steps taken were:
Plus, I added / modified parts of the scanned-original.
Ending up with a "blank" written-side postcard that could be printed later.
Matching the printing size of the image-side of the postcard to the "blank" written-side postcard.
Moved the two images (written/address postcard side and the image postcard side) into Microsoft Word for printing.
Tested the printing (print one Word page at a time; print on both sides of the paper) and came up with a print approach that works to my satisfaction.
Again, moved the four-postcard sample images into Microsoft Word and print in such a way that the two sides of the paper match up.
Modify the written/address side to meet my needs.
Modify the image side to be what I want.
On thicker-than-normal paper. Paper that is sufficient for mailing while giving a good impression of what my printed image was.
I used Photo Paper that was quite heavy and was able to be printed on both sides.
I printed the postcards using both the examples I mentioned earlier: One postcard per printed page (both sides of the paper) and four postcards per printed page.
The following images summarize the above-mentioned steps.
Click on the individual parts (postcards) of the images to see the part in full size. If you do click, you can then copy/paste or otherwise save the image into your own system for use with your own particular postcard testing. Use your Web browser's Back button to return to this Web page.
Testing the "Blank" Postcards.
Why test? To make sure your alignment is correct (back side to front side of the postcard) when printing on both sides of the paper.
When printing, I used the following:
After moving the image from PaintShop Pro into Word, resize the image to 5 inches wide (Word will keep the width/height ratio appropriate, as a default).
Indent the second (back) side of the single postcard 3.1 inches.
Word Margins: Top 0.5, Bottom, 0.5, Left 0.25, Right 0.25, Gutter 0, and place the Header/Footer from the edge 0.3
After moving the image from PaintShop Pro into Word, resize the image to 10 inches wide (Word will keep the width/height ratio appropriate, as a default).
Do not indent either side's image.
Word Margins: Top 0.25, Bottom, 0.25, Left 0.5, Right 0.5, Gutter 0, and place the Header/Footer from the edge 0.3
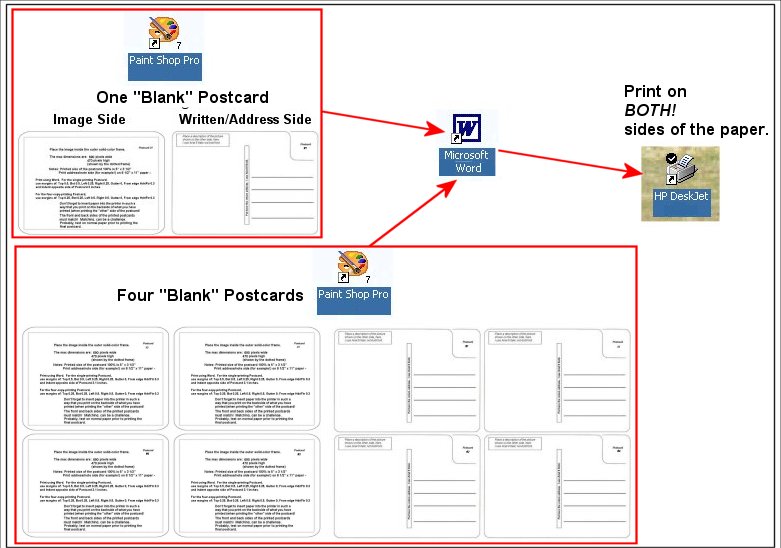
Once you have tested and are comfortable with the printing on both sides of the paper (use normal paper when testing!), then you can move the information into the "blank" postcards.
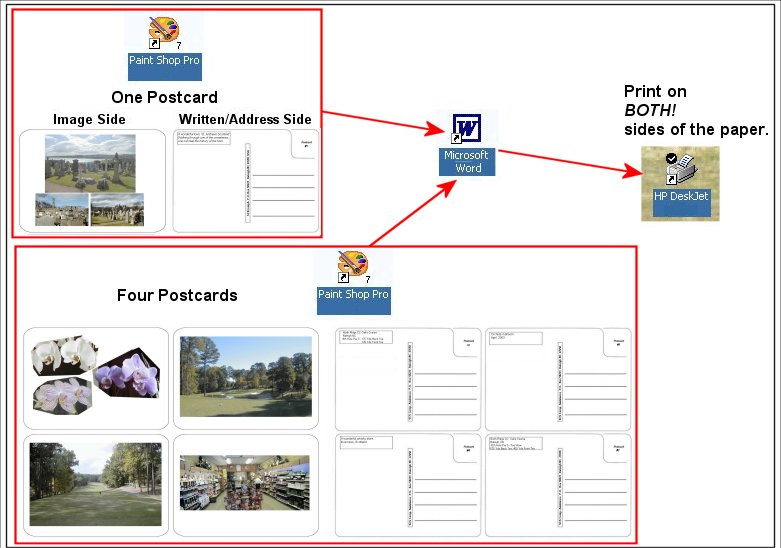
The image side of the postcard is easy. The image size maximum dimensions that I used are 690 pixels wide, 470 pixels high.
The written side of the postcard requires a little more modification. I modified:
Return address. I modified that and printed it with PaintShop Pro. Perhaps you would choose to blank it out with your image processing application and, then, hand-write what you want there.
I did not use PaintShop Pro to write on the postcard a text. I leave that are blank for hand-written information (common, when using a postcard!). Make certain the writing instrument you write on the photo paper (or whatever you print your postcards on) is permanent and non-smear.
Good luck with your postcards, if you give the approach a try!
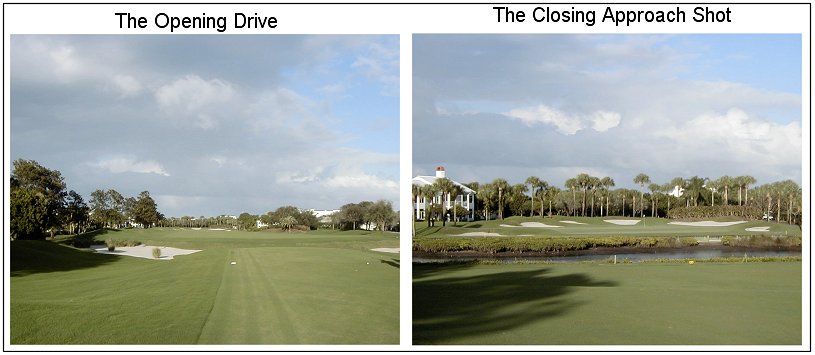
In Jupiter, Florida there are many fine/challenging golf holes. This is the 18th on the East Course at Jupiter Golf Course.
After a nice opening drive, the player is faced with a decision to "go for the green" on the second shot -- or lay up short of the water hazard and play a third shot to the green.
If you play the above golf hole, let me know what you decide to do!
.........
I wish you well in your picture taking and travels or other activities -- and hope you share that with a journal and Web-type of presentation you share with family/friends.
---------------
To contact me about anything on this Web page, please:
send mail to: SCScompA@aol.com
------------------------------
To return to SCScompA's newsletter May 2003 page click on: SCScompA May 2003 newsletter or use your Web browser's Back button.