Note: Multiple images are downloaded by this file. Please have patience until your web browser lets you know it has downloaded the images (a "Document Done" message or something similar will let you know that). It will take a few minutes! If you do NOT want to continue, just press the Stop button of your browser, followed by the Back button.
The photographs shown in this example are in the PC as a result of scanning the photograph or as obtained from a digital camera. The following pictures default to digital camera origin and, if not, the shown picture will be identified as a scanned image. Scanned photographs are scanned at 300 PPI (Pixels Per Inch), 150 or 100 PPI, and the chosen PPI will be identified in the comments for that particular image.
The following is aimed at showing examples of using the PC, digital cameras, and perhaps scanners, as part of home PC environment. Hopefully, the shown pictures will give you some ideas for your home use of PCs.
Contact SCScompA if you have any comments/questions regarding anything that is shown in this Web page.
The example used here was scanned from a Hallmark Birthday Card. The scanner detail was set at 150 Pixels Per Inch (PPI). After scanning, the resultant image was resized to have a height of 550 Pixels for showing as follows, below.
After the first picture, you click on the second picture as (hopefully!) indicated to see the remainder of the card.
PaintShop Pro was used to:
Browse the following to see what was done.

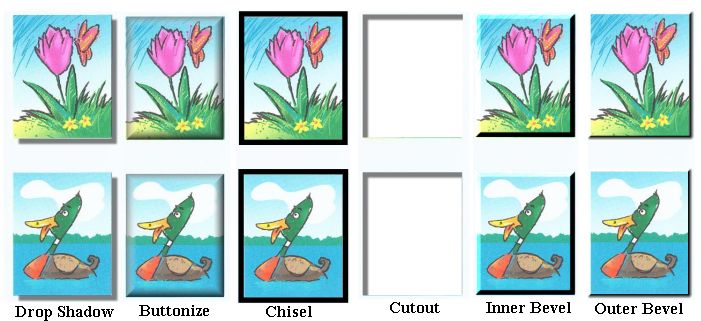
PaintShop Pro has support it refers to as "3-D" support that is intended to take part of an image and present it in a non-"flat" format. Below, are some examples. There is more to this topic than is shown here -- but, hopefully it gives you some ideas.
First, we show you the "flat" image as scanned. Then, we show you some results after using various options of PaintShop Pro's 3-D support.


Let me know if your display shows any noticeable differences.
For the following, the scanner was a Microtek ScanMaker V6upl. 48-bit color setting was used.
The sizes reported are as obtained from the scan operation.
After scanning, the image was resized for showing (below)to approximately 385 pixels wide by 550 pixels high. This was done for image-showing purposes and I find that the 550 pixels high size is fine for my PC systems.
Related to "performance" / time (for scanning the entire image prior to its being resized), the PC used was a 4-year-old 200 Mhz Pentium PC, 128 meg memory running Microsoft Windows 2000 Professional with the scanner attached to the PC's parallel connection.
Again, as I mentioned earlier, let me know if your display shows any noticeable differences -- and, what scan values you use in your home PC environment.
|
|
||||
|
-----------------------------------------------------
|
-----------------------------------------------------
|
-----------------------------------------------------
|
-----------------------------------------------------
|
-----------------------------------------------------
|

| 
| 
| 
| 
|
I also scanned part of the card. Again, the scanner was a Microtek ScanMaker V6upl. 48-bit color setting was used.
I selected the "Happy Birthday" text are from the card to see if I could notice differences in displaying/printing at selected scanning values.
After the scanning, I wanted to have the "small" portion of the text printed/shown at normal (USA) paper width. As you can see, the scanned-at-lowest scan value were not able to hold quality when enlarged.
The following tries to show, in image form, the results of the test. The shown images reflect, also, the printing quality differences.
|
|
|
|
-----------------------------------------------------
|

|
|
-----------------------------------------------------
|

|
|
-----------------------------------------------------
|

|
|
-----------------------------------------------------
|

|
|
-----------------------------------------------------
|

|
I continue to be satisfied with scanning at 150 PPI or 300 PPI. The 600 and, especially the 1200 PPI settings are simply outside the range of my PC's easy handling (the resultant files are simply too large to edit/modify).
As I mentioned in an earlier SCScompA newsletter, I sometimes use the 600 or 1200 PPI setting for small (1-to-2 inch) scanned areas/images. However, 99% of the time I use 150 PPI or 300 PPI.
Let me know what scan values you use and what type of PC/system you use to manipulate/show your scanned images.
I wish you good scanning -- and: Terrific viewing!
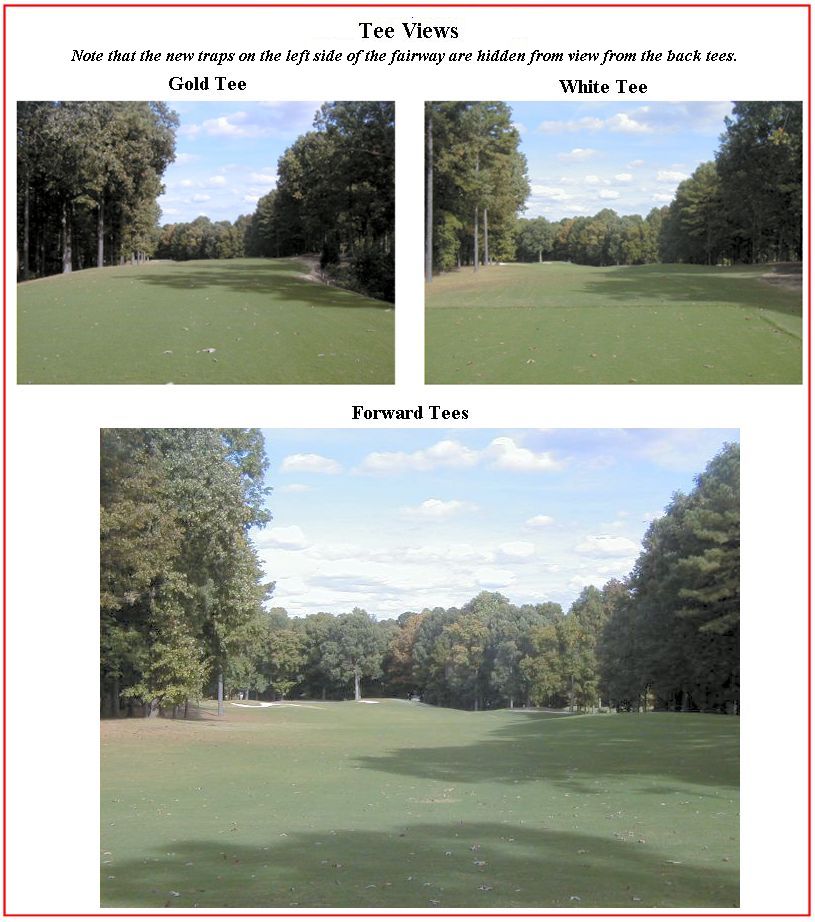
The following golf hole is located in Raleigh, North Carolina (USA).
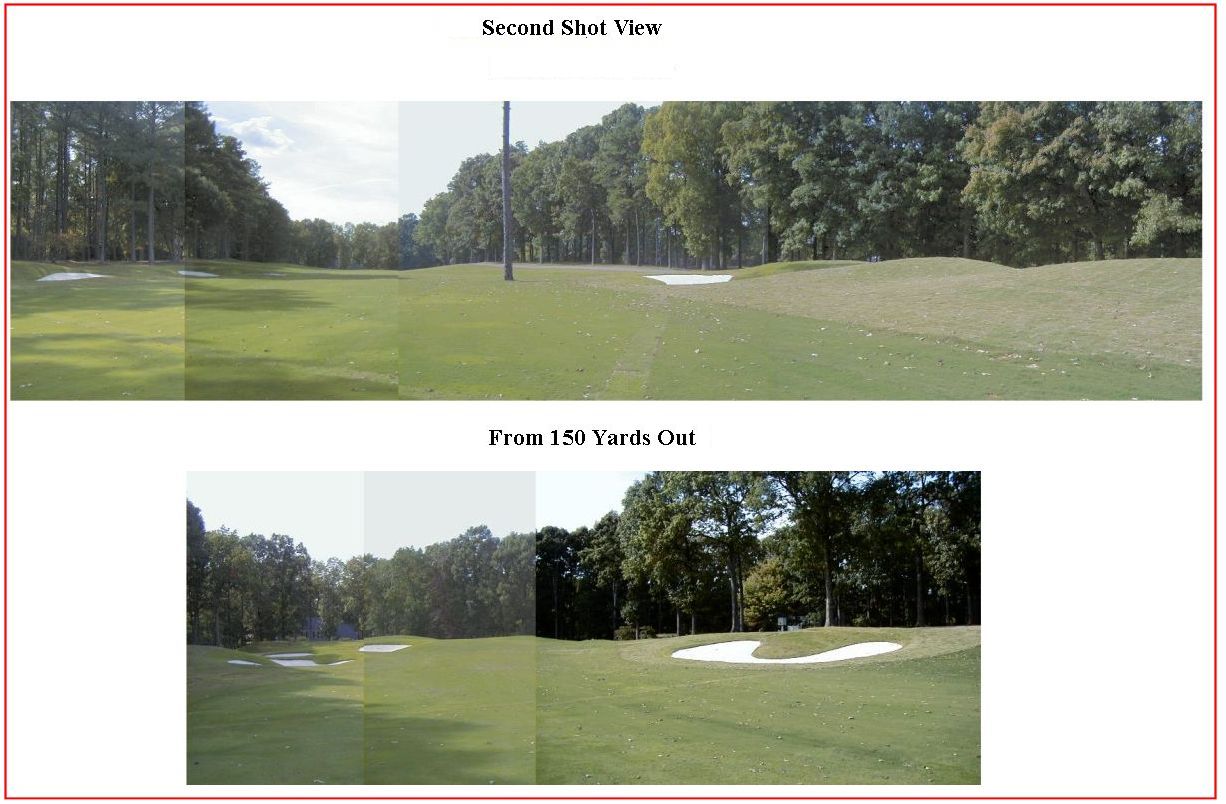
The hole is a dogleg left par 5 and recently underwent modifications. It was originally designed by Gene Hamm, whom we discussed briefly with last month's golf hole examples.
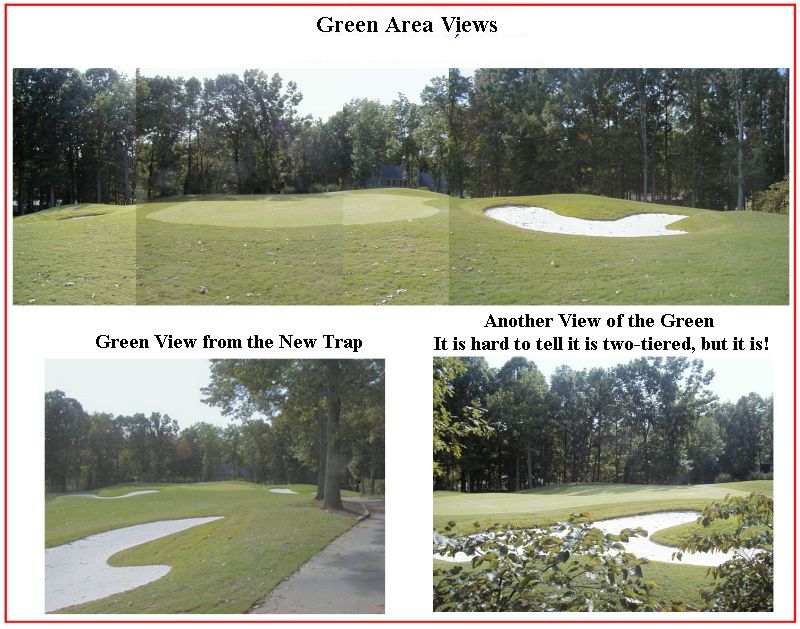
The tees have been enlarged and the total length of the hole has been lengthened. New traps have been added at both the left-side drive landing areas and in the second shot landing areas. The green was also enlarged and made into a two-tier green with a severe "gully" on the left side of the green.
The hole has not been opened for play, yet -- the grass is maturing -- and when it opens it will be interesting to hear player's comments as they compare it with the hole's original design.
The following example uses a table-format for positioning the shown images.

| 
| 
|
Let me know if you have played -- or expect to play in the future -- the above golf hole.
.........
I wish you well in your picture taking and travels or other activities -- and hope you share that with a journal and Web-type of presentation you share with family/friends.
---------------
To contact me about anything on this Web page, please:
send mail to: SCScompA@aol.com
------------------------------
To return to SCScompA's newsletter October 2001 page click on: SCScompA October 2001 newsletter or use your Web browser's Back button.